Description
A Windows 10 Installation is transferred from one machine to another. Effectively, the motherboard and CPU are upgraded for an existing Windows 10 Install on a HDD. When you go to move or migrate or transfer Windows 10 to a new motherboard, the license must also be transferred. In this case, an OEM license key for a RETAIL Windows license is used to re-establish the digital license.
Links
WD 1TB Portable External HDD
WD 8TB External HDD
Notes
1. Check your Windows license type as follows:
Open a command prompt your way or this way:
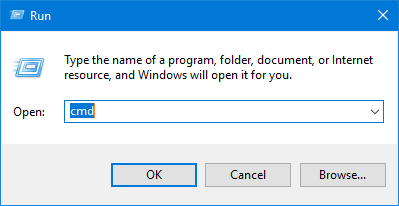
at the command prompt type: slmgr -dli
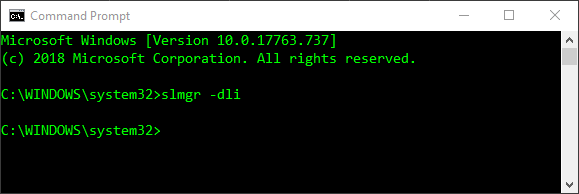
You should get a dialogue popup with your license type info:
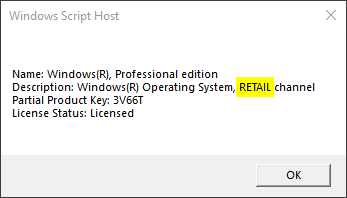
In this example, you can see the license type is shown to be a RETAIL license.
2. If you have Microsoft Office, you may experience a license error after this procedure. Don’t panic! If you are in the USA, just call 866-421-7141. You will get a bot. Let the bot send you the link & it will send you to a web page where you can re-activate. If you live extra-USA, you will need to search to figure out the right number to call.
Transcript
Welcome to the Grok Shop! In this video I’ll be demonstrating a Windows 10 OS and license migration. Now it might seem like I’m transferring Windows from one machine to another, but in reality all I’m doing is I’m upgrading my motherboard and my CPU for my current installation of Windows. Before attempting the migration, I highly recommend you do a full backup. To get started there, type [Win]+[s], and then type “backup”. Next, make sure backup settings are selected and press Enter or click OK. Now we’re gonna click on “Go to backup and restore (windows 7). Next, click on “Create a system image”. System image backups can take up a lot of space. It kind of just depends on how much space you’ve used on your hard drive. For me it’s gonna be about 630 gigabytes. So I’m gonna end up putting it on my network attached storage or NAS box. If you don’t have a NAS, or another place where you can store all the data that you’re gonna need for your backup, it might be a good time to invest in an external hard drive. If you happen to be in that camp, I’ll put some product suggestion links for you guys below. OK once the backup completes, we have one more preparation step. We need to bring up the device manager so just type [Win]+[s] and type “device” and select Device Manager. What we want to do is make sure the hard disk controller is generic to Windows and not specific to any particular chipset. To do that, we’re going to expand the “IDE ATA / ATAPI controllers”. So, in this area I have highlighted, if yours says “standard controller” or something to that effect, you’re good; you don’t need to do anything. If it says something like this, we need to make a change. To make the change, we’re going to right click and go to “update driver”. OK next we’re gonna select the second option: “Browse my computer”. Now we’re gonna select “Let me pick” and finally we can select “Standard SATA AHCI controller” and click “Next”. Once it’s done, it’ll prompt you to reboot. Don’t do that. If you were to reboot, it could reverse the change you just made. Instead of rebooting, we’re just going to do a shutdown so we can begin the upgrade. OK, so your next step will depend largely on your particular configuration. For me, I’m taking a Windows 10 Drive from one box, & moving it over to another box which used to have Windows 7 on it. So here you can see my target box. Basically, what I’m doing is making room for the windows 10 drive that I want to bring over. To do that, I’m going to move my old drive down a bit and make some space and also make sure I have enough power and SATA connectors to make the connections to the Windows 10 drive. For this scenario, I’m gonna make sure I connect the SATA connection for the windows 10 drive to the same SATA port on the motherboard that the old drive was connected to. If you have a new motherboard or one that you have not already been booting from, just make sure your windows 10 drive is connected to the SATA port that you plan to boot from. So now, back in my old box, I’m just going to remove the hard drive containing the Windows 10 installation. My target box has a Xeon CPU, which has no onboard graphics, so I definitely need an external graphics card. So at this point I’m going to go ahead and remove the graphics card from my original box and set it aside. If you need to farm any cables like SATA cables from the old box, this is a good time to do that, depending on the condition of your target box, you may want to do some cleanup. In my case, mine was a little dusty, but it wasn’t really bad enough to bust out the compressed air. If the cables in your target box are getting a little bit birdsnesty, this is also a good chance to reroute some of those cables and get things a little bit under control. [Applause] [Applause] OK now with all that done, I’ll go ahead and swap out the video boards. [Applause] [Applause] OK so now it’s time to boot. If you need to change anything in your BIOS, this is a good time to do it. Just hit delete or whatever your BIOS key is and go change it now, and hopefully if all goes well you’ll boot up into Windows and you’ll probably see a message like “Getting devices ready…” or something where it’s trying to find all the drivers for the new motherboard. [Applause] uh-huh No wonder my mouse wasn’t working! So as you can see, this method works. It’s worked for me all the way back to the Windows XP days and beyond, but that’s not to say that you can’t have problems. I do know of people who have had problems trying this. So, if it doesn’t come up right don’t panic – especially if you have a backup like I showed you how to do earlier. There are options and ways to get out of the bind that you find yourself in. I’ll have more information in the description below and also on the blog post that goes along with this and I’ll put a link to that in the description. So once you get logged in there’s still the issue of the license. So what you’ll find is Microsoft puts this little nag on the screen that actually overlays on top of your apps. It comes and goes but it’s still pretty annoying sometimes. So in previous years this process was actually a little more difficult. Recently Microsoft’s made it a little easier – especially if you have a digital license or one that you acquired for free by doing the free upgrade. So now we’ll type [Win]+[s] and type “activate” and select activation settings. Next, click “Change product key”. So my scenario is my Windows 10 installation came from a Windows 8.1 installation and on top of that, I did the free Windows 10 upgrade. So I do have a “digital license” (quote-unquote). What that means is I’m just gonna enter my windows 8.1 product key even though it’s an OEM key. The sticker for the Windows key – whether it’s 8.1 or 10 or whatever – usually looks something like this. If it’s not on your box, you might find it stamped on some of your documentation. Once you enter the key and Windows has a chance to phone home, you should find that you’re activated. You’ll see a little message indicating as much right under the activation area. So now, the only thing left to do is to update any drivers where you feel like something’s not working right or you know that there’s a newer driver that you want to have. To get the latest drivers, of course, you just head over to your motherboard’s and manufacturer’s website. In this case here, mine’s EVGA. You need to know your model and if you don’t know your exact motherboard model just type [Win]+[r] and then put “msinfo32” in the box press ENTER and then under “baseboard product”, you’ll see your motherboard model. So that’s it for this video. I hope you found it helpful. If so, be sure to thumbs me up, leave me a comment, or share me. Be sure to subscribe to be notified of my future computer related videos. But as far as transferring Windows 10 from one machine to another? That’s how it’s done.